There are QoS settings which can be made within Windows! They work with desktop and server OSes, to set priorities on either network traffic of specific binaries, or by port and type. If you see programs or services stopping unexpectedly, stuttering, et cetera, this is good to try. Here is a basic guide in PDF:
http://notes.ponderworthy.com/file_download/12/Basic_PC_QoS.pdf
The steps:
- Load up
MMC.EXE. - Open the File menu
- Choose Add/Remove Snap-In.
- Click Group Policy Object Editor on the left.
- Click Add.
- Click Finish.
- Click OK.
- Open up Local Computer Policy, Computer Configuration, Windows Settings, Policy-based QoS. You’ll see the following, with the policy list being blank if you haven’t done this yet.

- Right-click on Policy-based QoS, and choose Create new policy. Set a name, and then set the DSCP value:
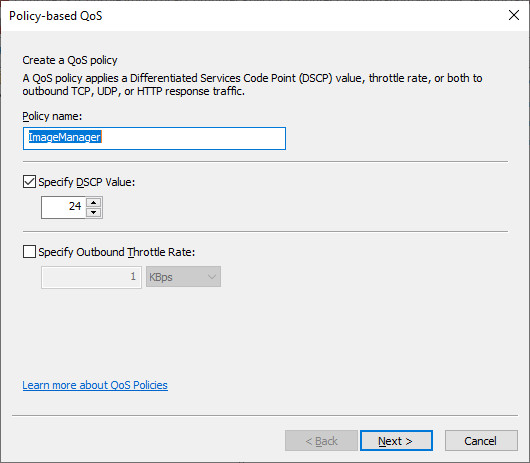
The DSCP value is the priority level for the policy. The range is zero through 63. Here is one common DSCP value set:
0 …………………..General Traffic, unprioritized
10 …………………Backups, file transfers, non-business applications
25 …………………Mission-critical data, including SQL, video streaming
34 …………………Video conferencing
46 …………………VoIP
Another set, not quite the same, standardized within the WMM wifi standard:
8-23 ………………Background (BK)
24-31, 0-7 ………Best effort (BE)
32-47 …………….Video (VI)
48-63 …………….Voice (VO)
The above are far from a coherent standard everywhere; one can even find lists which peak at 30. For my needs within PCs, I have been setting my critical apps at 31, important apps at 24, and not bothering with anything else. And it is needful to be conservative. If you QoS some things too high, Windows won’t be able to do background things which keep it running…like, say, the Windows desktop ☺
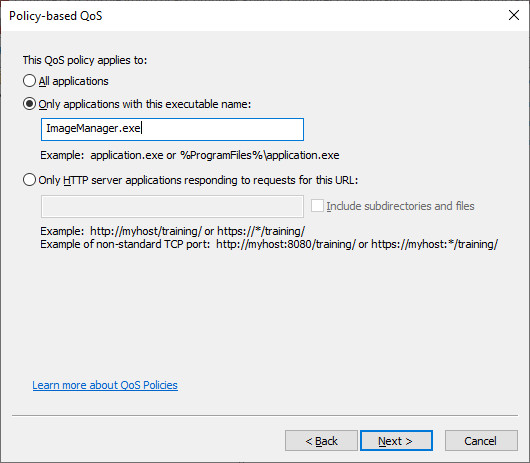
- At this point you need to decide on the type of QoS policy you are creating. You create them to work by TCP/UDP port for all applications, for application binaries of specific names, and for HTTP/HTTPS URLs.
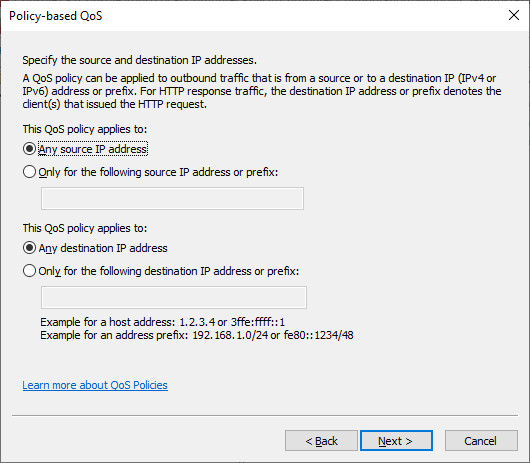
- You may now choose IP address(es) to which the policy applies.
- And then TCP and/or UDP ports to which the policy applies. Default is TCP only.
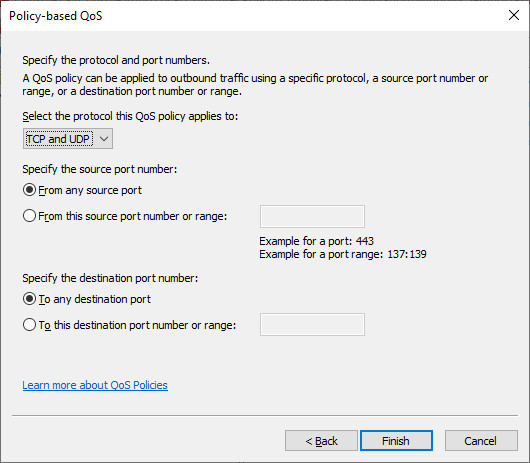
And now you’re done with that policy, and you can create as many more as desired.