This works:
Write-Host "Beginning..."

# Manual / forced Automate agent removal
# from https://docs.connectwise.com/ConnectWise_Automate/ConnectWise_Automate_Documentation/070/020/010

TASKKILL /F /IM LTSVC.exe 2> $null
TASKKILL /F /IM LTSvcMon.exe 2> $null
TASKKILL /F /IM LTTray.exe 2> $null

CMD /C 'SC DELETE LTSERVICE 2>NUL' | Out-Null
CMD /C 'SC DELETE LTSVCMON 2>NUL' | Out-Null

CD HKLM:\SOFTWARE
Remove-Item LABTECH -Force -Recurse 2> $null
CD HKLM:\SOFTWARE\WOW6432NODE
Remove-Item LABTECH -Force -Recurse 2> $null

Remove-Item C:\WINDOWS\LTSVC -Force -Recurse 2> $null

Write-Host "Done!"
Categories:
Miscellaneous
Application Issues
An epiphany, after a rental:
My truck doesn’t have any road sensors to malfunction or replace!! And neither does Sweet Lori’s car!!! Yahoo!!!!!
Categories:
Miscellaneous
My sweet Lori’s 2007 Ford Focus came with a “permanent” air filter, “suitable for the life of the car” by one suggestion. After we had had the car a while, I knew we wanted to keep it running long, long past Ford’s glorious preferences, so I started looking for options. One well-known vendor sold an aftermarket air filter box for about $480. This seemed a bit high to me for a mildly complicated piece of plastic, so I looked further. And lo and behold:
www.rockauto.com/en/moreinfo.php?pk=8624632&cc=1433435&pt=11160&jsn=1
Highly recommendable, and $78 at this writing. I saw some reports which said it made things a tad louder; au contraire I must report, Sweet Lori’s little car is now quieter, much smoother, better power. Yahoo!
Categories:
Miscellaneous
As of March of 2024, there is clear success to report, and more to come. This is negatively ionized air, being sent into engine air intakes. Here it is:
ioninjection.ponderworthy.com
Categories:
Miscellaneous

I have an Evercross H5 and an NIU KQ3i. I like the careful design and self-control of the NIU, but I have had to do a few things. Here’s a reference pic of my NIU:
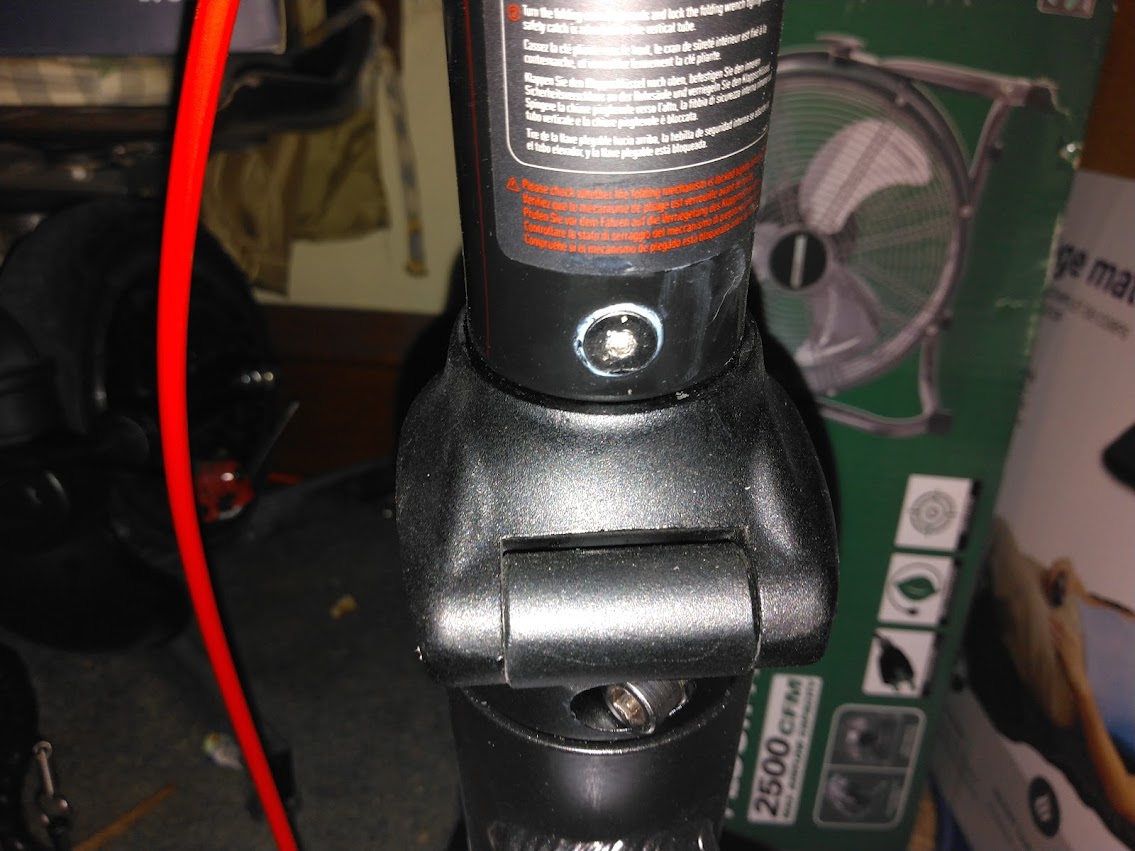
First of all, on every single screw of the stem, I’ve added Blue Permatex Gel. This has kept them all from loosening.
Secondly, concerning the two silver screws on each opposite side near the bottom of the stem. These loosened often for me, even with B.P.G. I thought about trying Red Permatex, but there’s common advice to avoid this because you’re not going to get the screw out without serious heat, and we’re screwing into aluminum here. So I looked far and wide, and found some thin countersink washers that fit:
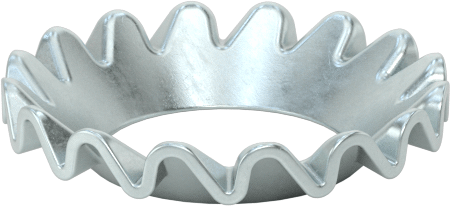
from McMaster-Carr (a great source for lots of things, click on the image for detail)
and used one of those on each silver screw. By the time I got that far, I had stripped the head of one of the silver screws, and I replaced it using McMaster:
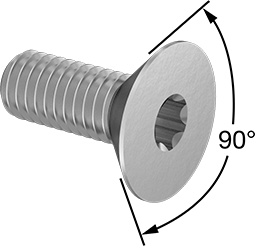
You’ll notice that my replacement is Torx, not hex; this is deliberate, Torx is more resistant to stripping. Also, that screw is made of a very durable alloy. Have had zero trouble with either silver screw since.
I also tightened the larger hex bolts further down, you can see one of the two in the first pic above.
Lubrication has been helpful also, around bearings and really all over, though you don’t want it on your brake disks. The best so far has probably been CRC Electrical Silicone Lubricant. The “Electrical” part is very important because this is a very electrical device, and we don’t want anything sneaking in and either damaging or shorting anything out!
Categories:
Miscellaneous
A Great Lawnmower
article #1426, updated 1454 days ago
Our lawnmower finally wouldn’t start this year. I suspect it needs electrical cleanup or something, but it’s an extremely heavy Menard’s special which was a gift from a friend of Sweet Lori’s, and I just didn’t want to put money or time into it. So I put money into a new Toro 21” battery-operated mower. And I am flatly amazed.
It is lighter than anything I know of comparable in gas, even though its construction is nice steel; its maintenance is hose it off and charge the batteries; it folds vertical for storage (it’s set up well for this, and no liquids, no hot parts…); there’s absolutely no lack of power; and it mows our whole yard in half a battery. It’s a Toro 60V (same as my very happy leaf blower bought last year), so I have two more batteries if I need them. We have wonderful neighbors who have mowed our yard before, so I’m going to have that kind of fun soon.
But the most intriguing part for me, was what happened when the mower pulled us to denser growth. Immediately that thing knew it and increased the power output. The first and second time it happened I thought something might be wrong, but no, it knows, and it drives that power up and down according to need of the moment, immediately, no hesitation at all. (This is why well-implemented brushless motors are a very good idea.) For ages, some gas mowers have had “regulators” that are claimed to do the same thing, and I’ve used a number of them, but they’re nothing like this. It was “vroom!!!” and then wonder and look to see what was going on, and only then, “Oh, now isn’t that nice!” The only slight “gotcha” is that overall result tends to pull the walker occasionally, but for me that’s almost more of a plus than anything, it keeps me going at a good pace; I tend to be a slacker at mowing!
It was also interesting to see the result. I do the mulching thing, and not bagging or shooting, because I flatly don’t want the bother and the bags. Every other mulching mower I have ever seen work, leaves some larger bits as it addresses denser growth. Not this one. I walked around the whole yard after I was done, I had had the mower set on quite short, and I saw absolutely zero sign of cuttings. Zero. Amazing.
Categories:
Miscellaneous
Once upon a time, there was a rather self-confident boy, nine or ten years old, who managed to convince his parents to buy him a ten-speed bicycle for his birthday. The family went to Sears, then a rather good place for such things, and the boy spotted his bicycle, a beautiful red-and-blue model, the latest one. The boy set his heart immediately, and it was good. But the boy also saw, in the corner of his eye, his dad very carefully quietizing a reaction to the sprocket-derailleur gearing which was just in that year starting to be sold to most people, rather than to just mostly esoteric racing folks. The boy enjoyed the bicycle for a long time, and replaced it eventually with another not very different, and then another. But he never forgot.
And he noticed, that that gearing tended to do odd things. After a number of years this became very understandable to him. In this now most common of bicycle gear shifting, the chain is literally yanked off of one sprocket, onto another, in mid-air. Somehow, theoretically, this is supposed to be reliable, and is said to be so by lots of people! But after a lot more years, the boy, now a bit older, noticed that the friends and others who were talking the most about reliability, all not only had very expensive bicycles, but also, had devoted their whole garages to their upkeep, with expensive tools and liquids and whatnot. They washed the chains at least every week and sometimes every day, examined the sprockets for wear very often, et cetera, et cetera, devoting much precious time.
And the boy remembered his dad’s bicycle, and his parents’ tandem bicycle. The first had three speeds, in a sealed hub, and it was working well and steadily, without washing chains, and certainly without sprocket replacements or any other major work, for decades. The second had five speeds, similar hub, similar results.
So he looked into it, as there now was an Internet. He found that those hubs are still made, even well-known in some places, and now in eight-speed and higher…and are very highly recommended by those who know them. The highest were very expensive, but eight-speed was within reach. So he brought this information to local bike shop mechanics…all of whom gently but firmly steered him away from this. They gave lots of reasons. They were clearly not happy with the idea of such a project, so he decided to let it go, at least then.
But the thought would not go away. So, years after that, the boy finally called in a wider radius, and found a really good and creative bicycle mechanic about 50 miles away, named Ron, and his amazing wife Lorena, who run Eclectic Bikes in Emporia, Kansas; they were intrigued with the idea. They set up a Shimano Nexus 8 for me, with a chain tensioner, and now I have a Real Bicycle :-) And it is simply marvelous!!!!
How so?
A good way to see it, is to consider what happens when a bicycle reaches a busy intersection which is at the top of a hill. We’re already pedaling hard to get there, applying force on that chain and sprockets. We have to downshift, in order to do either of two necessary things: first, to be low enough to take off fast into the traffic at the top, and second, to be low enough to get up the hill still rolling as traffic builds towards the intersection. So we downshift with everything under great stress, which is the worst time for this, and one of three things happens. One, it shifts. Two, the chain goes somewhere bad, and you’re not going anywhere until you pull that (dirty and greasy) chain up by your hand and put it where it needs to go. Three, something worse happens, and there is worse out there, including a broken chain.
And one can find hundreds, not unlikely thousands, of web pages out there, which explain why those things happen. They don’t tell you when you buy the things, but you really are expected by the component-manufacturers to clean the chain (any one of a few dirty, stinky, time-consuming, unpleasant procedures) and the sprockets before any very long ride. And of course, if such a hill comes at the end of a very long ride, we can imagine the situation.
The contrast with the internal hub, takes my breath away. The shifts just work. There is none of the pull-and-hope. You change the gears and they change, and you have what you need, for hill or traffic or sharp corner. And not only that, but you can shift perfectly well while standing still. Sprocket-and-derailleur can’t do that, you can only shift while pedaling, because it’s the pedaling which works with the derailleur to yank the chain – but it also means that stress situations, especially at the end of a ride, are the times you’re most likely to wipe yourself out if you need to shift for safety. Hub gearing is marvelous this way; for one example, if I’m at a stop light which is built onto a hill, and I need to change my direction from up to down, sprocket-and-derailleur can be very difficult, both because of the need to pedal to shift and because of the risk. But for this or any other difficult situation, with my gears, I just shift, whether standing still or moving slowly or coasting, and I’m immediately using everything I Ihave to get in there and out of there safely and smoothly!
Thanks, Dad!!!
J.E.B.
Categories:
Miscellaneous
Sweet Lori and I have rather hard water from our city supply, lots of dissolved mineral content which until recently has gradually coated bathtub and kitchen fixtures et cetera, slowly but very steadily over time. We have had to replace three bathtub faucets, at least two shower heads, and two or three kitchen faucets, over the last twenty-plus years, and every time it was quite shocking to look in the business ends and see the light brown layering of hard-water deposit. I have looked at water softeners, but the space, effort, and expense just did not quite seem worth it, and also I have liked the taste and feel of “softened” water even less than the test of our water! I have looked at osmosis systems and other things, but always the expenses, both initial and ongoing; and with many of them, if you delay the maintenance you can put yourself and your family in some danger, and there’s no easy bypass unless you put in extra pipe or redo what you have. Bleaugh.
Yesterday (2019-12-15) though, I happened to remember that in March of this year, I had begun to try something, a simple derivative of something else I had found online which looked conceivably good. It turns out that this is working well: my best test is the business end of our kitchen sink sprayer-faucet ( ), and lo and behold, there is no new hard water scale, and what there is is slowly and steadily going away!:
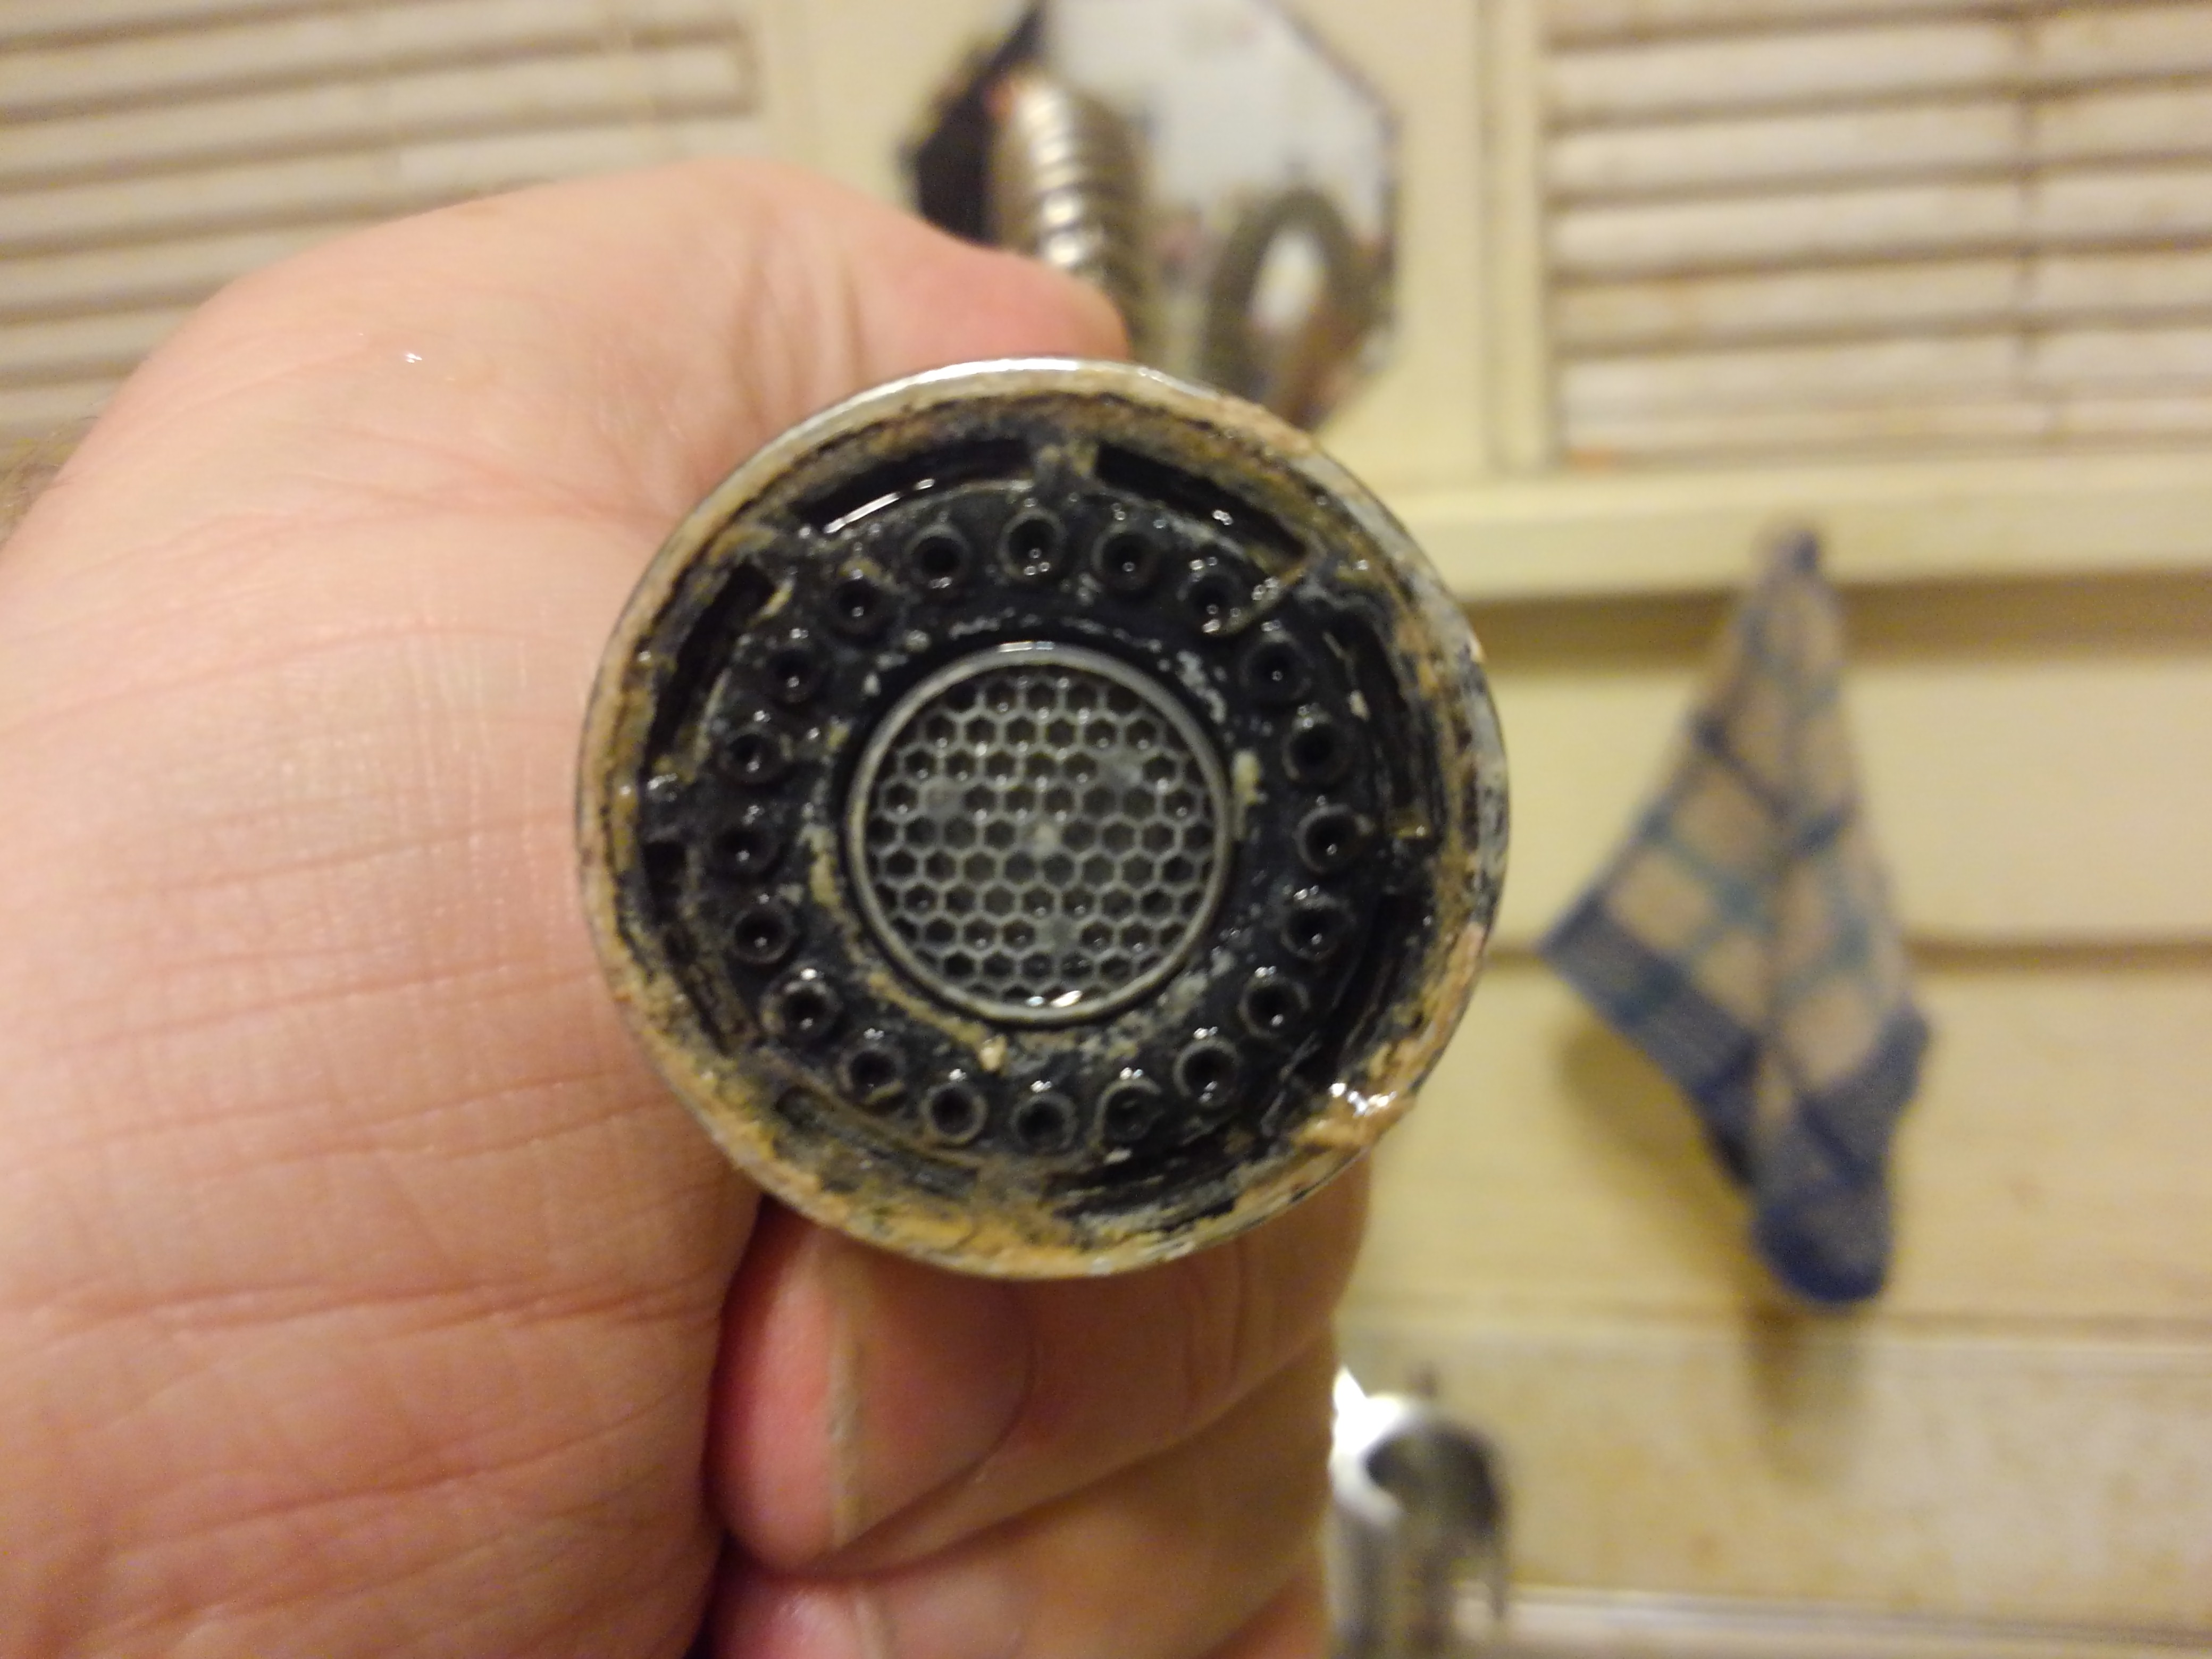
In March that same end was getting to the point of needful replacement, there was layering, significant blockage, and related behavior. Any effective attempt to scrape, clearly would have damaged the device, but now slowly the gunk is going away! I am rather happy about the prospect of not replacing this among other potentially difficult things anytime soon!!!!
So the question is, how is this happening. Well, at first, in March, I was on the verge of buying one of the “electronic hard water descalers” which are made by quite a startling number of companies out there now. A simple Amazon or Qwant search will show you what I’m talking about. I noticed the large size of the plethora, and decided to dig in to see what these things are doing. I did not find nitty-gritty details, but I found enough to convince me that all of these things are driving electrical power or signal of some sort, through one or more coils wrapped around copper or PVC (and not iron) pipes. And the one thing which is absolutely consistent, is that doing this shall generate a magnetic field through that water, regardless of further detail.
And then I happened to blunder into two little companies, out of the huge throng, which were selling strong permanent magnets for exactly the same purpose. They were charging a good bit for those magnets.
So, thought I, permanent magnets are a whole lot simpler than electronic widgets, they need no power, they don’t burn out or short out or any of the other relevant concerns. So let’s try it, and no need to go the expensive specialist route, magnets are magnets, and powerful ones in very relevant shapes abound.
It turns out that a lot of small electric motors these days, are made using rings of “arc magnets”. I found that in our basement (which was subject to some plumbing creativity before we arrived), the city supply 3/4” is reduced quickly to 1/2”, so I bought two sets of ten of these:
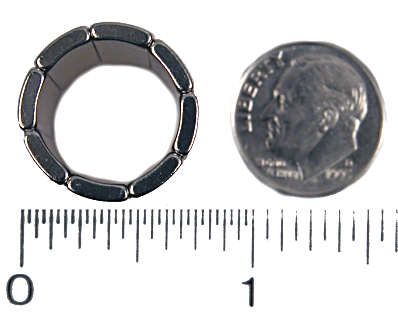
from Apex Magnets.
The above picture shows eight of these arc magnets in a circle, but we need 10 to go around our standard 1/2” copper pipe. These are very strong magnets, they can easily do major harm to fingernails and even fingertips; if you don’t have strong hands, get someone with strong hands to do this for you, there is a certain amount of real danger. These are very strong.
And here is how our sets look in place:
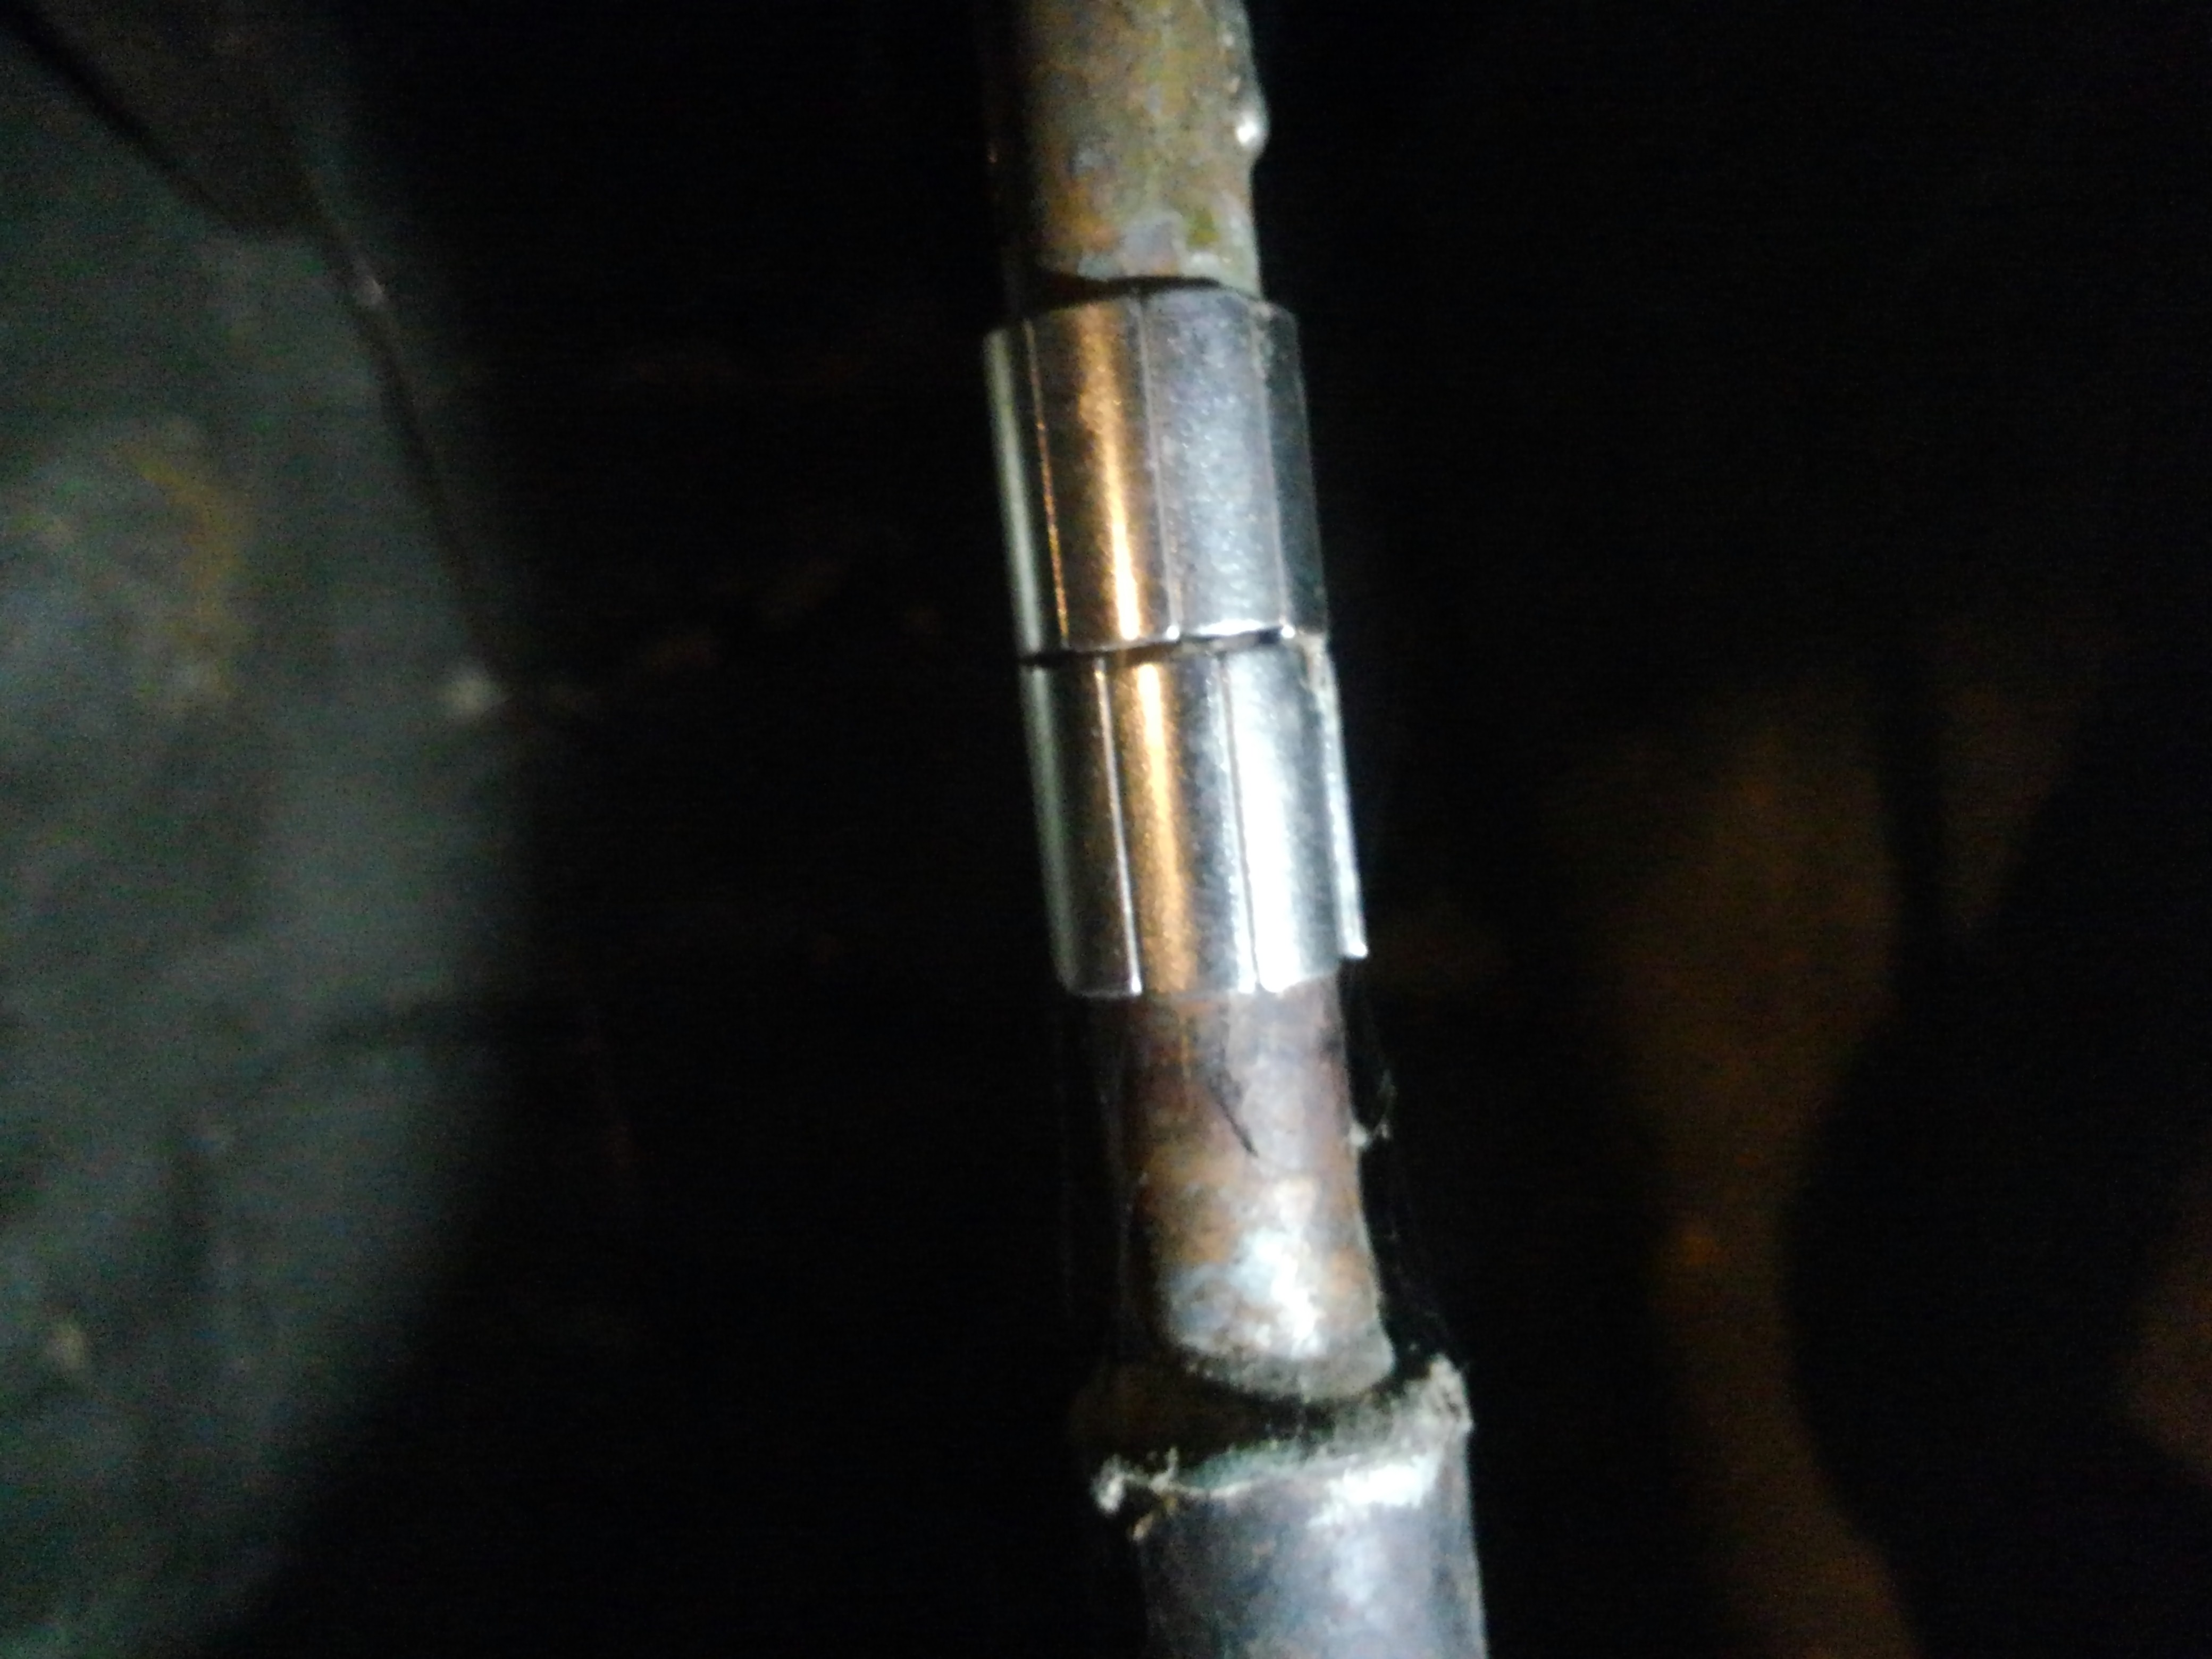
Most house supply pipe is 3/4”, more of these will be indicated for this. The results are most happy over here! I am likely to get more, so I can put them on the street-side of the house valve, that should keep the scaling out of that valve. I’ll be looking for other arc magnets sized to hug 3/4” pipe better, too.
Categories:
Miscellaneous
Hardware
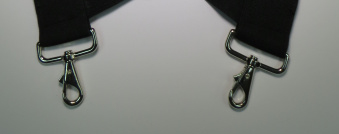
This post is not for all or even most, certainly :-) But if you want suspenders which snap onto belt loops, rather than the usual variations on alligator clips or buttons, they really exist and work very well, from here:
https://www.suspendease.com/snap-on-beltloope-suspenders.html
Here’s a pic:
Categories:
Miscellaneous
Admittedly this is a bit of a contraption, but it has worked wonderfully. I type a whole lot at work, and over time tried a large number of ways to get rid of hand and arm stresses. Eventually, having got my positioning right, I found that an enormous remaining stress was my mouse and most especially the left-click, which we all do a very large number of times per day. So I bought this:
www.clearlysuperiortech.com/cst2545saw
from here:
www.ergoguys.com/pctrac-tracball-w-superiorx-button-control-softwar.html
which is a nice big trackball for multiple fingers or palm (I found the small ones worse, not better, than my mice), and more importantly, those three jacks. It’s one jack per mouse-button. Originally I had thought to bring left and right buttons to foot, but I ended up doing just the left, which has done me just fine and dandy. I initially bought two of these:
www.clearlysuperiortech.com/external-buttons
similarly:
www.ergoguys.com/sbuexsw.html
because they were not expensive; I destroyed the first one (with my foot, they’re not exactly designed for stomping) in a few months, which gave me enough time to figure out what to do. Soon I received a marvelous inspiration, and looked into a “ribbon switch” or “tape switch”. These are industrial components used on conveyor belts to detect items, and safety applications where one wants to stomp on something to get it to stop. So I bought one of these:
www.tapeswitch.com/store/proddetail.php?prod=1100
in the one-foot length to save at least a bit of money, with the aluminum channel for mounting (I think this is needed), mounted it on a 48”×6”×3/4” piece of wood, had my friendly neighborhood electronic musical instrument shop solder me a 1/4” mono phone plug on its wire, ran a long wire from that plug to the 1/8” jack on the trackball…and it works!!!
There is a bit of technique I have had to learn for it to work easily, a kind of bounce of my heel to mimic a rapid left-click; and I do sit now with one shoe off, tread does not help; but I have zero pain in my hands after work these days, which is quite the joy.
Admittedly the trackball and ribbon switch are not inexpensive. On the other hand this trackball looks and feels, inside and out, that it will work for decades, and the ribbon switch is an industrial component, so unless I mounted it badly it will do for a nice long time. The only thing I might have done differently is to get a longer ribbon switch, probably two feet long, though that is luxury, not necessity!
Categories:
Miscellaneous